Your Toolbar, Your Way: Making Goodnotes Work for Your Specific Workflow
Goodnotes becomes even more powerful when it’s customized to fit the way you think and work. This step-by-step tutorial walks you through setting up your toolbar so your most-used tools are always within reach, helping you journal, plan, or create with less friction. By tailoring Goodnotes to your specific workflow, you’ll spend less time adjusting settings—and more time actually using your digital notebook with ease.
Steps:
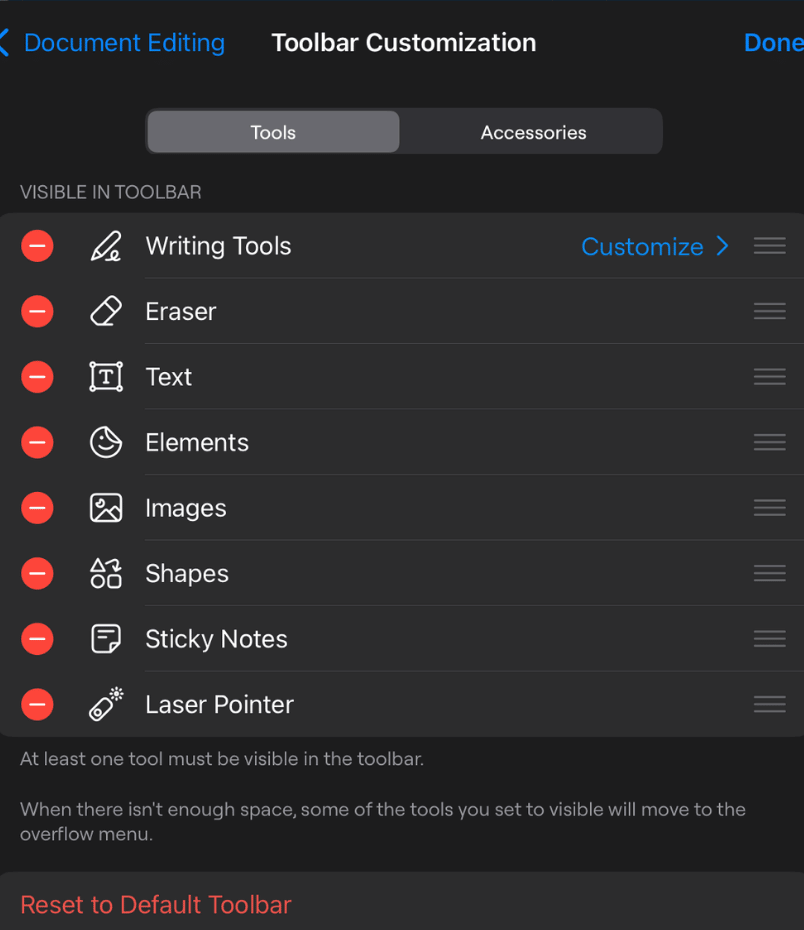
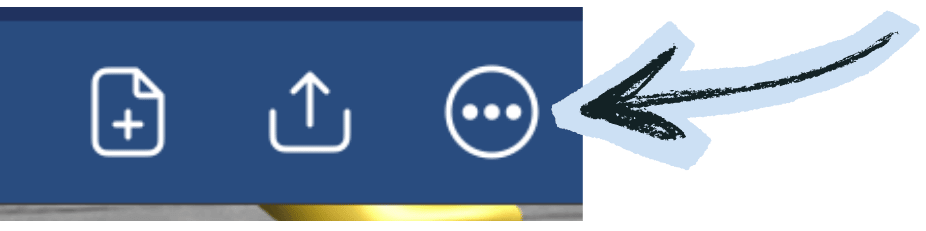
Click on the dots at the top of your screen
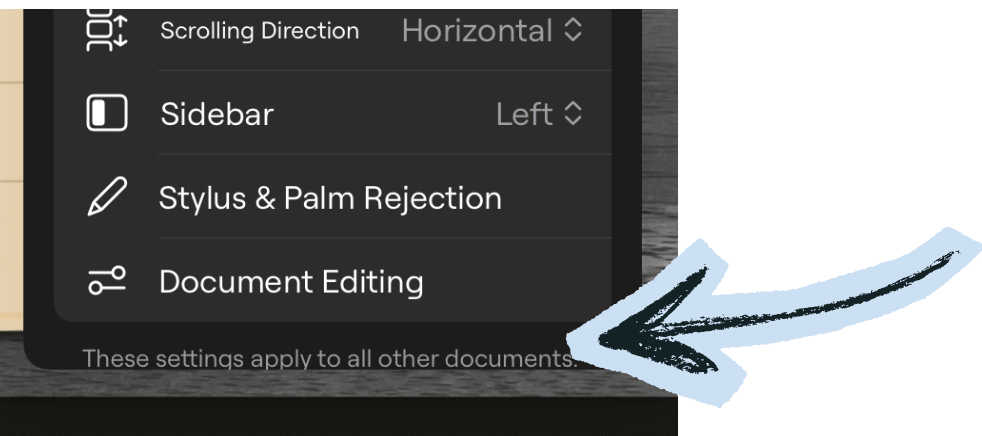
A window will pop up, scroll down to “Document editing”
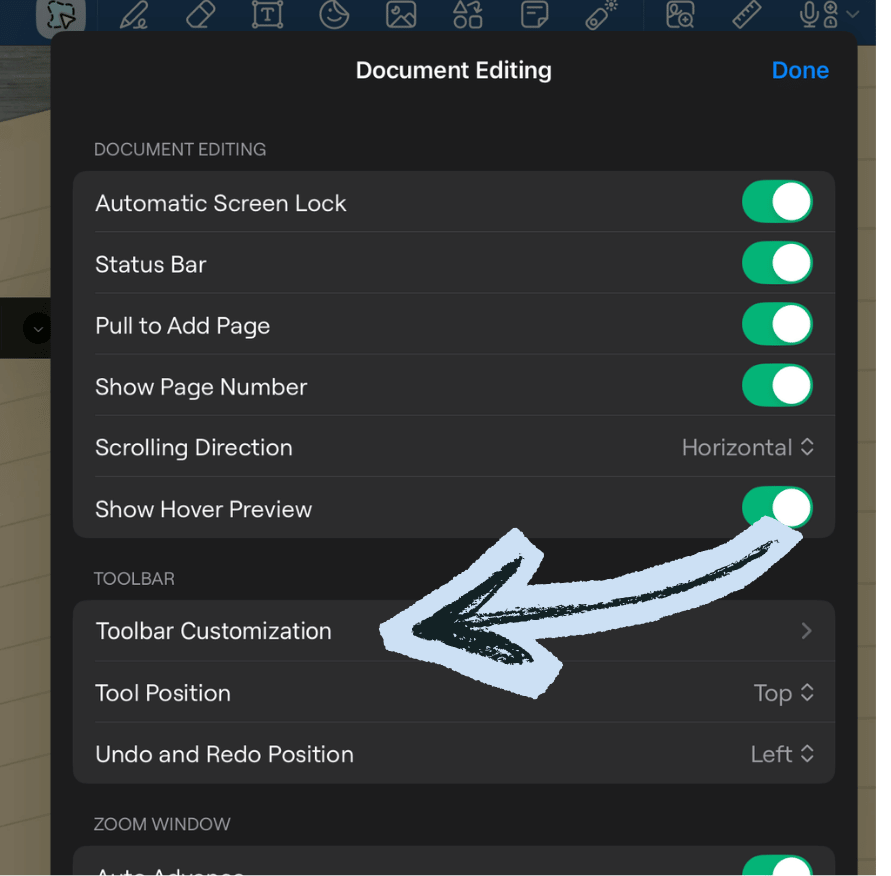
Another widnow will populate where you’ll click “Toolbar Customization”
From there you can click on the red dots to remove or green dots to add different functions to your tool bar.